Built in Window Seat

HOME RENOVATION
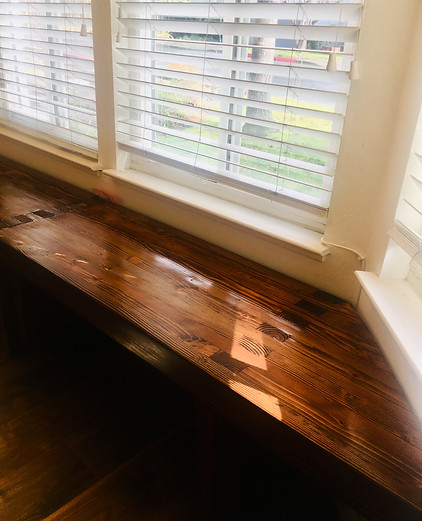
Since we have bay windows in our dining room, we wanted to make a built-in window seat for them. I looked at a lot of designs and decided to go with a box joint bench which makes for an extremely sturdy construction that looks elegant, almost like a floating bench,


The idea of box joints is that the vertical and horizontal boards (for the legs and seat respectively) interlace with each other.

The first step was to rip cut the boards on my table saw to make them flat using a jointing jig that I built. Next I cut the boards to length so that they would fit perfectly into the space which measured ten feet wall to wall. Then I glued the boards together.

Once the boards were glued into a single piece, I hand planed the top perfectly flat. I got a nice Stanley "Sweetheart" low angle hand plane, which was razor sharp (quite literally) and a pleasure to use. It's a workout, but it's nice not to have all the sawdust. Instead I had piles and piles of these wood shavings.


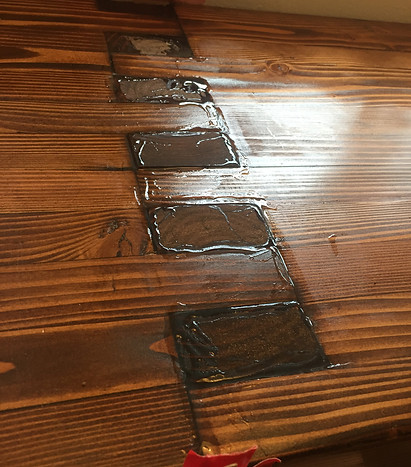
I also used a Japanese saw to cut flat any of the protruding vertical boards from the legs. Then I filled the small gaps in between the boards with epoxy resin mixed with sawdust, and sanded that flat.
With the surfaces perfectly smooth, the next step was to stain and poly everything. I assembled the bench into two parts so we would be able to move it, not to mention lift it, since I didn't want to sand or stain in the dining room obviously. The final step after everything dried was bringing in the two parts and connecting them.


Above you can see the epoxy resin where the two parts were connected, and then the same area after the resin was sanded down and the area was stained and given a new coat of polyurethane.


The biggest learning curve for this project was learning about making the wood dimensioned so it would fit perfectly together. The first step was to understand the difference between jointing and planing. Planing means making a side of wood level, that is, on a plane. Jointing means making one side parallel or perpendicular to another so they can be joined perfectly together. So if you are milling or dimensioning wood, you need to first plane one side of the wood with a planer and then joint the other sides with a jointer. That means you can't just buy a power planer for $500 you also need to buy a power jointer for about the same price. That's a lot of money and takes up a ton of space. You'd think you could just buy milled wood in the first place, but wood always ends up having a little bit of warp in it. When joining together long pieces the slightest error becomes magnified (think of how non-parallel lines diverege more and more the further they travel).
I decided to go with hand planing, which opens up a whole other world of costs (do I really need 10 different hand planers? Do I really need to get the one that costs $500? Do I need to pay even more for several diamond plate sharpening stones?). I'm not skilled enough yet to get two pieces perfectly joined together geometrically using a hand planer, so I'm still relying on getting things pretty close and covering up any anomalies with epoxy resin and a nice buffed poly coating. I have to cynically roll my eyes when I see blog posts that assume that all the wood pieces will perfectly fit together after passing through your table saw. Caveat emptor.